Mortar, Mint, and Method: A Gingerbread House That Actually Holds Its Shape
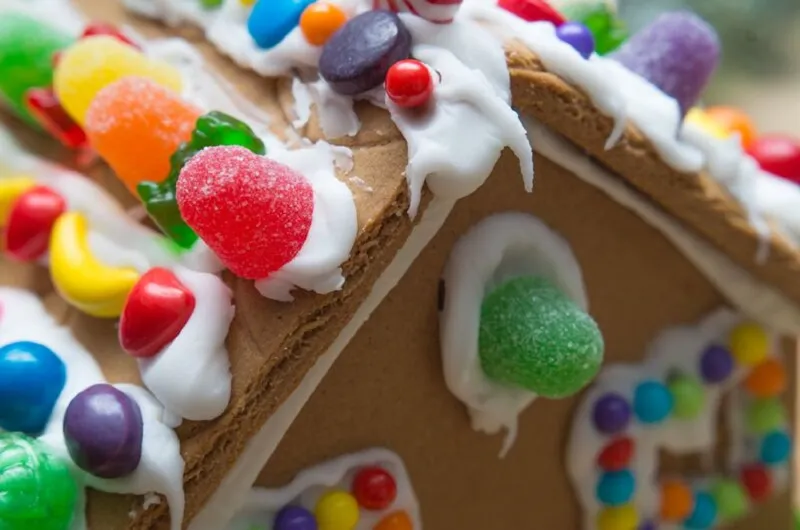
There are two kinds of gingerbread houses in this world: the ones that look adorable for about six hours and then develop a roof line like a tired sofa, and the ones that hold their shape until you deliberately take a bite. Fiona's Sweet Shoppe is firmly in favor of the second kind. A gingerbread house is a craft project, yes, but it is also a tiny building. Treat it like one and the holiday magic lasts a lot longer.
Begin With a Construction Plan, Not a Mood Board
Before you buy a single gumdrop, decide on the footprint. A simple rectangle with a peaked roof is not boring; it is stable. Sketch the front, side, and roof panels on paper, then use that sketch as your template. If you are baking from scratch, roll the dough evenly and chill it before cutting so the walls stay flat. Bake the panels a day ahead and let them dry completely on a cooling rack. A kit works fine, too, but give the pieces the same drying time. Warm gingerbread is flexible gingerbread, and flexible walls are how you end up with a lean-to instead of a house.
Set the whole thing on a sturdy cake board or a cutting board wrapped in foil. That board is your foundation, and it makes the house easy to move when the party moves to the kitchen.
Royal Icing Is Mortar, So Mix It Like Mortar
The icing from a tub is for spreading on cinnamon rolls. For construction, you want royal icing mixed thick, about the consistency of toothpaste. It should hold a peak and resist sliding down the side of the bowl. Pipe a generous bead along the bottom edge of a wall, press the wall into place, and hold it for a slow count of thirty. Use cans of soup or small boxes as braces while the seams cure. Let the walls set for at least an hour before you add the roof. The roof is the heaviest part of the build, and it will tell you immediately whether your mortar was too thin.
Keep a second batch of thinner royal icing for piping details later. Structural icing and decorative icing are different jobs. Do not ask one bowl to do both.
Candy Is Reinforcement, Not Confetti
The best gingerbread houses use candy the way a builder uses beams, brackets, and trim. Peppermint sticks can act as porch columns. Candy canes make sturdy roof ridges. A row of hard candies along a seam adds visual charm and a little extra grip. Gumdrops are better as bushes than as roof supports. Licorice ropes are excellent for window frames because they bend, but they will sag if you try to use them as posts. Chocolate squares make handsome pavers, though they soften near warm holiday lights. If a candy is soft, chewy, or prone to melting, it is decoration, not structure.
What to Buy at the Candy Counter
- Peppermint sticks and candy canes: the load-bearing heroes. Use them as columns, ridge caps, fence posts, and porch rails.
- M&M-style candies: reliable roof shingles and path stones. Apply them in small rows and do not flood the area with icing, or the colors will bleed.
- Gumdrops: good for bushes, chimney caps, and low roofline accents. They are heavy, so place them where gravity is not working against you.
- Sour belts and licorice ropes: flexible trim for window frames and door outlines. Keep them horizontal or gently curved.
- Candy melts: excellent edible glue dots for anchoring heavier pieces. Melt a small batch and use it sparingly.
- Lollipops: instant lampposts and trees. Unwrap them and trim the sticks if they are too tall.
- Marshmallows: lightweight snowdrifts and chimney smoke. Not structural, but very forgiving.
- Rock candy: dramatic icicles. Heavy, so use a few rather than a curtain.
- Gummy bears: adorable, but not load-bearing. They also weep color in humid rooms.
A quick word on bleeding: red and green candies are the usual suspects, especially gummies, jelly beans, and coated chocolates in a damp kitchen. If you are decorating on a rainy day, keep the wet icing away from the bright stuff and add those candies last.
The Build-Now, Decorate-Later Calendar
A gingerbread house does not have to be a same-day scramble. Think of it as a small construction schedule.
Day one: bake and dry the panels. If you are using a kit, open the box and let the pieces breathe. Day two: assemble the walls with thick royal icing. Brace them and let the seams cure. Day three: add the roof. Let it set for a full day if the house is large or the weather is humid. Day four: add candy reinforcement and big structural decorations, like peppermint columns and cookie steps. The day before the party: pipe details, add the delicate candies, and fill in the landscaping.
Store the finished house in a cool, dry spot, away from radiators, sunny windows, and curious pets. Do not refrigerate it. Chocolate will bloom and crackers will soften. A cake dome or a large cardboard box works well if you need to keep dust and small hands at bay.
Three Candy Mistakes That Cost You a Wall
First, gluing wet candy to wet icing. Give the structural seams time to set before you hang anything heavy. Second, overloading the roof. A roof covered in thick candy can slide right off its icing hinge. Third, using soft candy as a support. A gummy bear is a resident, not a foundation.
Know When to Put Down the Piping Bag
At some point, the house is done. The roof is on, the peppermint porch is standing, and the candy path looks festive enough. Stop there. Gingerbread houses are meant to be eaten, not archived. Royal icing gets hard and candy gets stale, so plan to enjoy the house within a week or two of building it. Take the photo, invite the family to admire it, and then let the kids dismantle it with a butter knife and a sense of purpose.
The best gingerbread house is not the one with the most candy. It is the one still standing when the party starts, with enough structural integrity left for everyone to steal a roof tile on the way out. That is a sweet ending worth building toward.